ESP32 Button Controlled LED with Arduino IDE
https://www.youtube.com/watch?v=5FbvQyRBkBM&t=602s ## Introduction This project introduces **digital input handling** with ESP32. A push button will be used to **control an LED**, turning it on when the button is pressed and off when released. ## Required Components - ESP32 Board - LED - 220Ω, 10KΩ
https://www.youtube.com/watch?v=5FbvQyRBkBM&t=602s
#Introduction
This project introduces digital input handling with ESP32. A push button will be used to control an LED, turning it on when the button is pressed and off when released.
#Required Components
- ESP32 Board
- LED
- 220Ω, 10KΩ Resistor
- Push Button
- Jumper Wire
- Breadboard
#Pinout
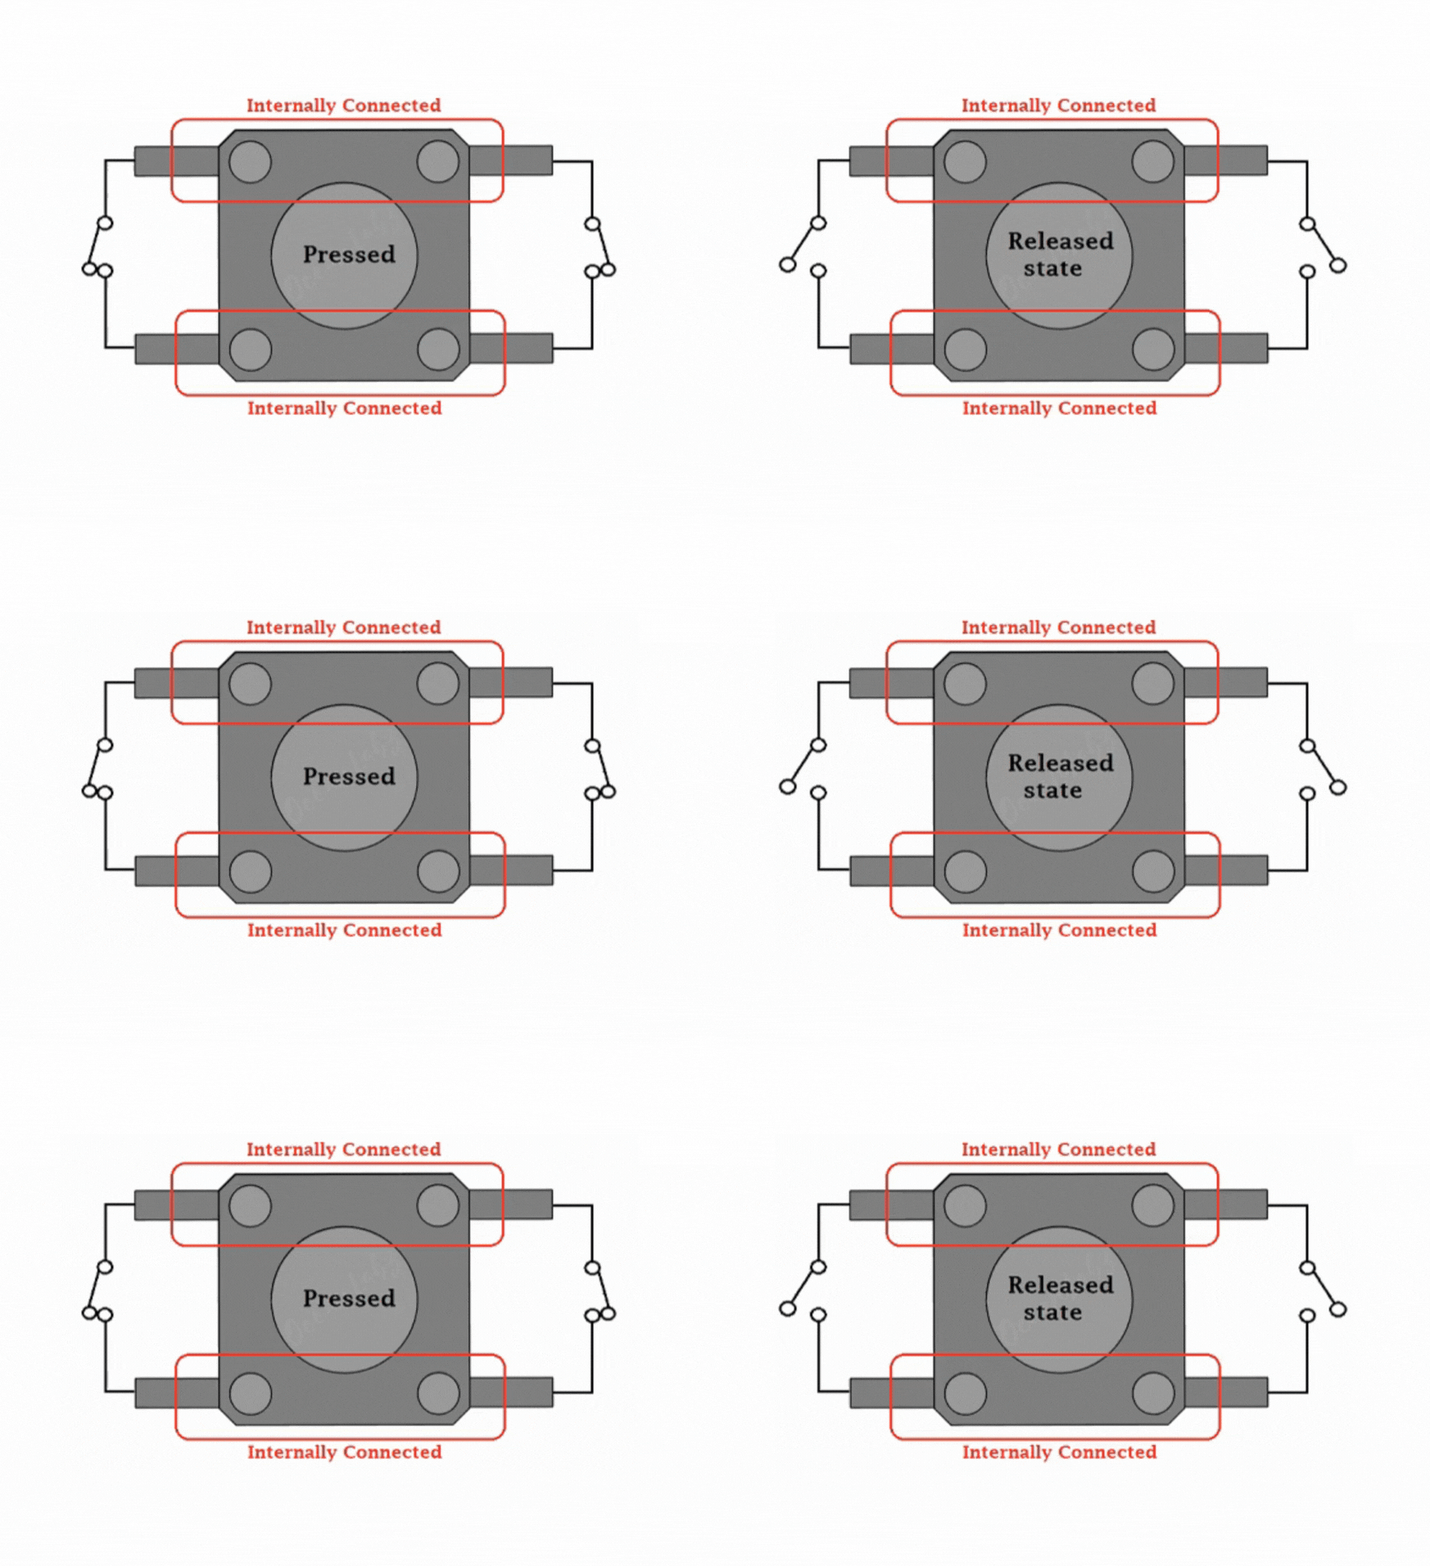
- Switch Pinouts
- Button Pressed: When you press the button, the metal contacts inside touch, creating a connection. This allows electricity to flow, completing the circuit.
- Button Released: When you release the button, the contacts separate, breaking the connection. This stops the flow of electricity, turning off whatever device it’s controlling.
- LED Pinout
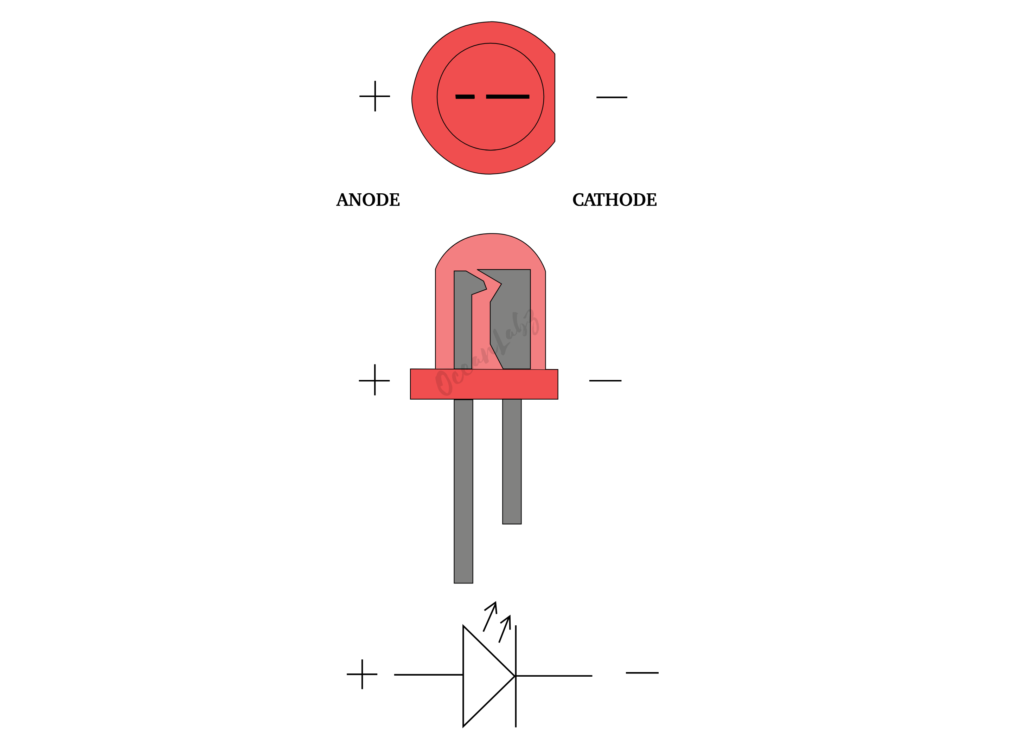
- LED Anode (+)
- LED Cathode (-)
#Circuit Diagram
- ESP32 GPIO 5 → 220Ω Resistor → LED (Anode +)
- ESP32 GND → LED (Cathode -)
- ESP32 GPIO 18 → One Side of Push Button
- ESP32 GND → One Side of Push Button
- ESP32 3.3V → One Side of Push Button with 10k Ohm Resistor (For pullup)

#Code / Programming
/*
Filename: ol_button_led_control.ino
Description: ESP32 program to control an LED using a push-button. LED turns ON when the button is pressed and OFF when released.
Author: www.oceanlabz.in
Modification: 1/4/2025
*/
#define LED_PIN 5 // GPIO 5 connected to LED #define BUTTON_PIN 18 // GPIO 18 connected to push button
void setup() { pinMode(LED_PIN, OUTPUT); // Set LED pin as output pinMode(BUTTON_PIN, INPUT_PULLUP); // Set button pin as input with internal pull-up resistor }
void loop() { int buttonState = digitalRead(BUTTON_PIN); // Read the button state
if (buttonState == LOW) { // If button is pressed (LOW) digitalWrite(LED_PIN, HIGH); // Turn LED ON } else { digitalWrite(LED_PIN, LOW); // Turn LED OFF } }
#Explanation
- Push button is connected to GPIO 18 with an internal pull-up resistor.
- When the button is pressed, GPIO 18 reads LOW, and the LED turns on.
- When the button is released, GPIO 18 reads HIGH, and the LED turns off.
#Troubleshooting
- LED Not Responding? Check if GPIO 18 is correctly connected to the button.
- LED Always ON? Ensure pull-up resistor is enabled or manually add a 10kΩ resistor.
- Button Not Working? Try changing GPIO 18 to another pin in the code.