ESP32 Web Server with Multiple Sliders: Control LEDs Brightness
## Introduction Controlling LEDs with sliders through a web browser? Yes, it’s possible — and super fun — using **ESP32 and WebSockets**! In this beginner-friendly guide, we’ll show you how to create a **responsive web interface** with multiple sliders to control the brightness of LEDs using **PWM (
#Introduction
Controlling LEDs with sliders through a web browser? Yes, it’s possible — and super fun — using ESP32 and WebSockets! In this beginner-friendly guide, we’ll show you how to create a responsive web interface with multiple sliders to control the brightness of LEDs using PWM (Pulse Width Modulation).
#What You’ll Need
- ESP32 Dev Board
- 3 LEDs (Red, Green, Blue or any)
- 3 Resistors (220Ω recommended)
- Jumper Wires
- Breadboard
- USB cable for programming
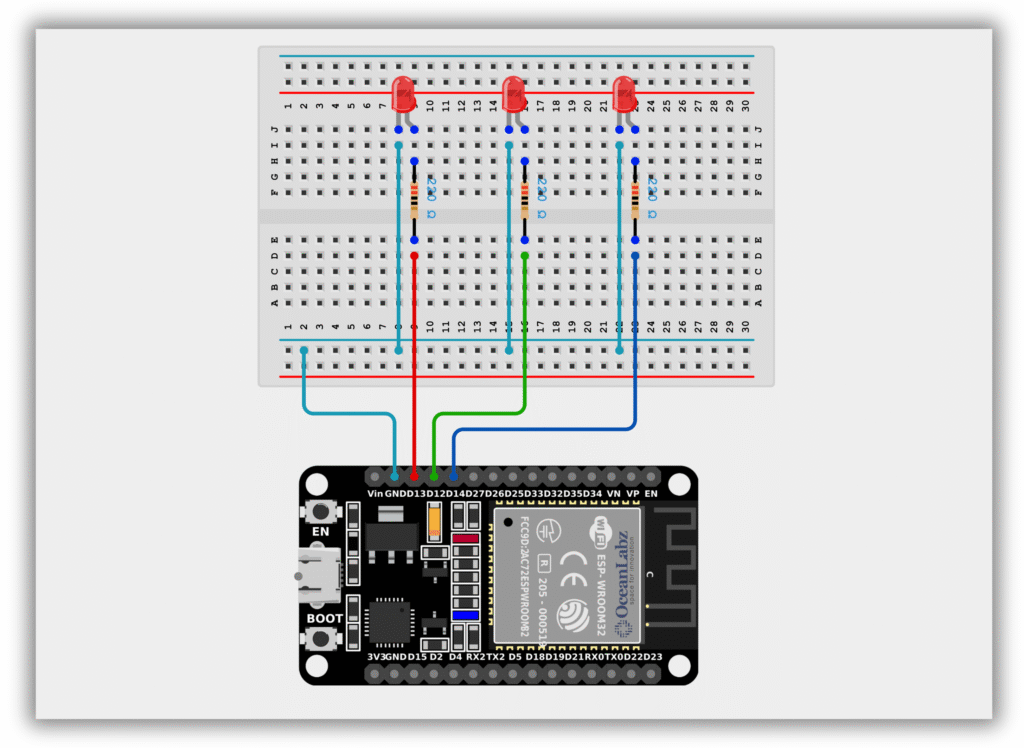
#Circuit Diagram
- Connect the red LED anode to GPIO 13 (via a 220-ohm resistor) and cathode to GND.
- Connect the green LED anode to GPIO 12 (via a 220-ohm resistor) and cathode to GND.
- Connect the green LED anode to GPIO 14 (via a 220-ohm resistor) and cathode to GND.
#Code / Programming
Please ensure that the ESP32 board package version 2.0.17 is installed in the Arduino IDE. Using an older or incompatible version may result in compilation errors or unexpected behavior in the code.
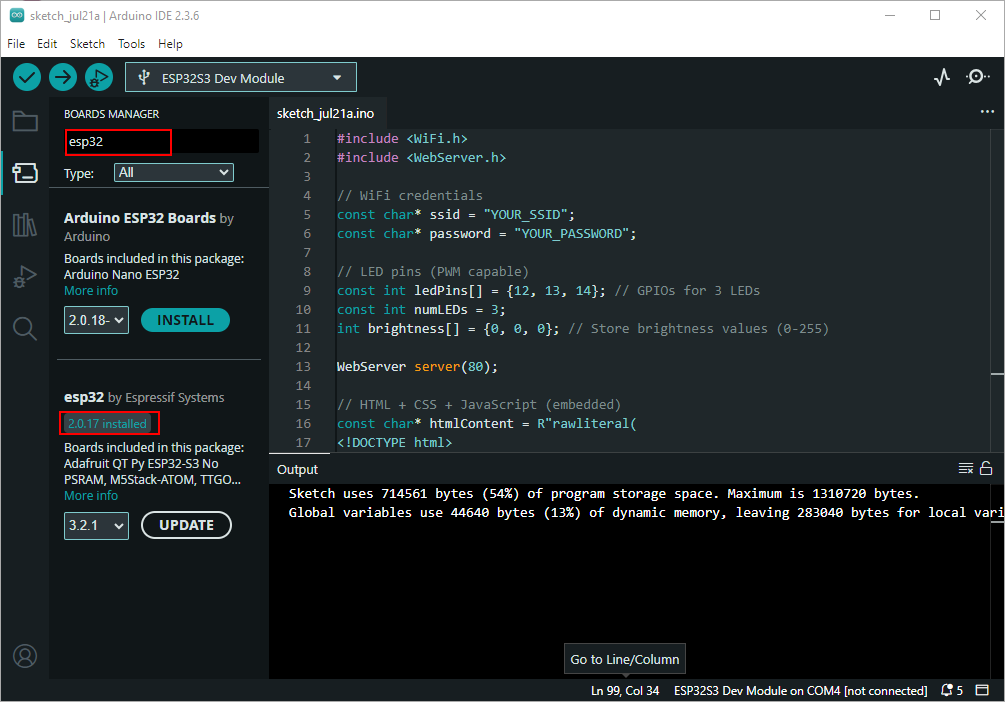
#include <WiFi.h> #include <WebServer.h>
// WiFi credentials const char* ssid = "Your_SSID"; const char* password = "Your_PASSWORD";
// LED pins (PWM capable) const int ledPins[] = {12, 13, 14}; // GPIOs for 3 LEDs const int numLEDs = 3; int brightness[] = {0, 0, 0}; // Store brightness values (0-255)
WebServer server(80);
// HTML + CSS + JavaScript (embedded) const char* htmlContent = R"rawliteral(
ESP32 LED Brightness Control
LED 1: 0%
LED 2: 0%
LED 3: 0%
void setup() { Serial.begin(115200);
// Initialize LEDs for (int i = 0; i < numLEDs; i++) { pinMode(ledPins[i], OUTPUT); ledcSetup(i, 5000, 8); // Channel, freq, resolution ledcAttachPin(ledPins[i], i); }
// Connect to WiFi WiFi.begin(ssid, password); while (WiFi.status() != WL_CONNECTED) { delay(500); Serial.print("."); } Serial.println("\nConnected to WiFi"); Serial.print("IP Address: "); Serial.println(WiFi.localIP());
// Web server routes server.on("/", []() { server.send(200, "text/html", htmlContent); });
server.on("/setLED", []() { int led = server.arg("led").toInt() - 1; // Convert to 0-based index brightness[led] = map(server.arg("brightness").toInt(), 0, 100, 0, 255); ledcWrite(led, brightness[led]); server.send(200, "text/plain", "OK"); });
server.begin(); }
void loop() { server.handleClient(); }
#Accessing the Web Server
After uploading the sketch, open the Serial Monitor at 115200 baud and press the RESET button on the ESP32. If everything is fine, it will display the dynamic IP address.
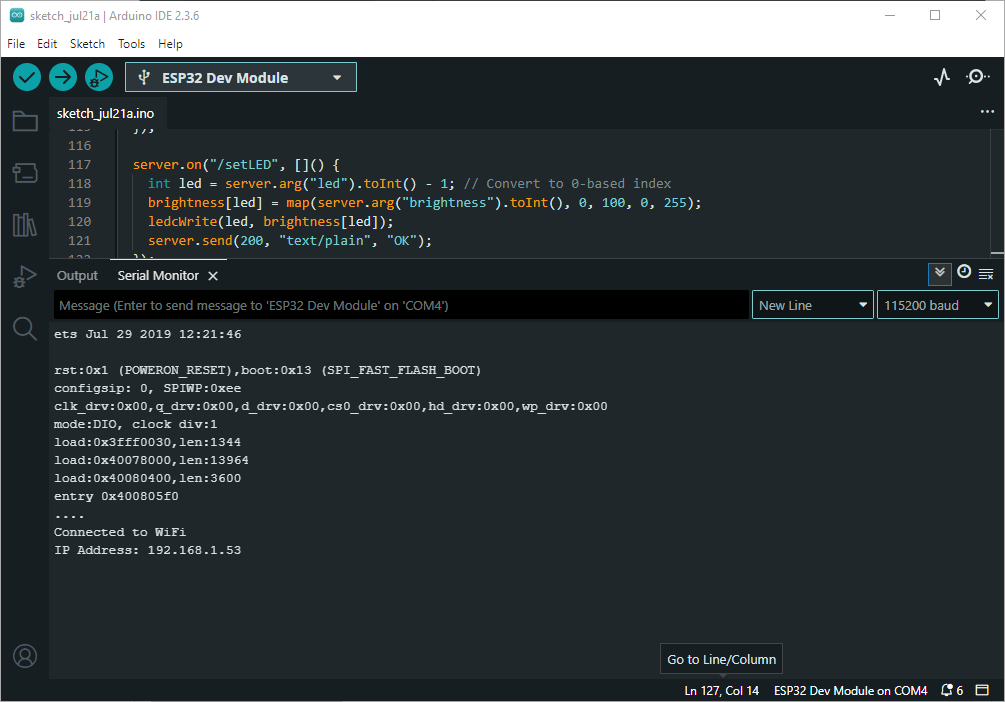
Open a browser and enter the IP address shown in the Serial Monitor to access the LED control interface.
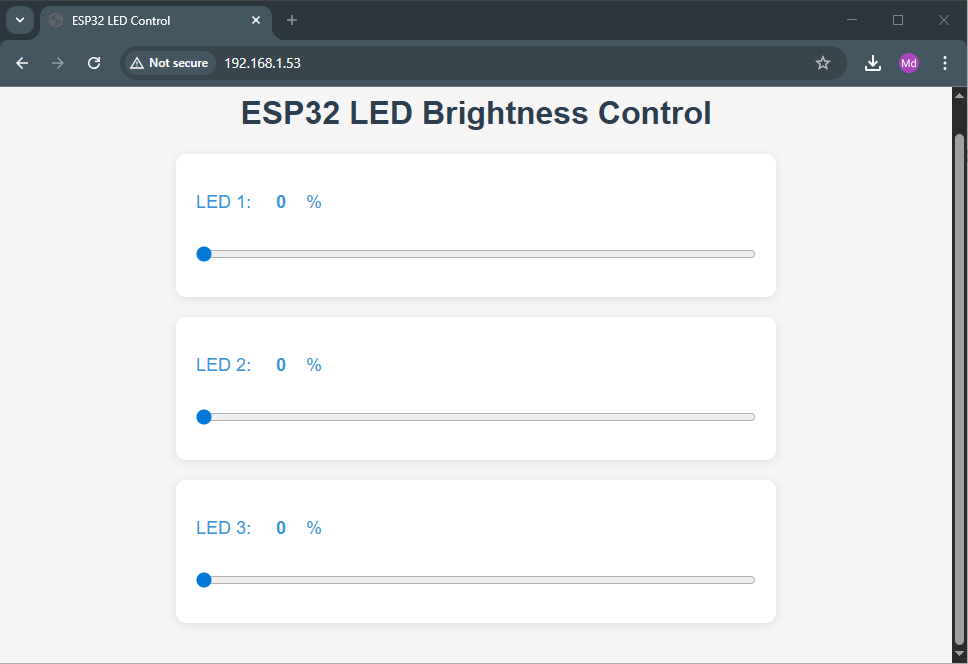
#Explanation
- ESP32 connects to Wi-Fi and starts a web server.
- The IP address is displayed in the Serial Monitor after connection.
- Users can control the onboard LED by accessing the web page through this IP.
#Troubleshooting
- If the IP doesn’t show, check Wi-Fi credentials and Serial Monitor baud rate.
- Make sure you're connected to the same network as the ESP32.
- If the webpage doesn’t load, verify the board is still powered and connected.