ESP32 Relay Module (Web Server)
## Introduction The **ESP32 Relay Module Web Server** allows you to control a device like a **DC motor** using a web interface. Although relays can control AC appliances, this project is designed to control **battery-powered motors**, ensuring safety. It is ideal for **beginners and kids**, avoiding
#Introduction
The ESP32 Relay Module Web Server allows you to control a device like a DC motor using a web interface.
Although relays can control AC appliances, this project is designed to control battery-powered motors, ensuring safety.
It is ideal for beginners and kids, avoiding the dangers of working with high-voltage AC power.
With a simple webpage hosted on the ESP32, you can easily turn the motor ON or OFF remotely.
#Required Components
- ESP32 Board
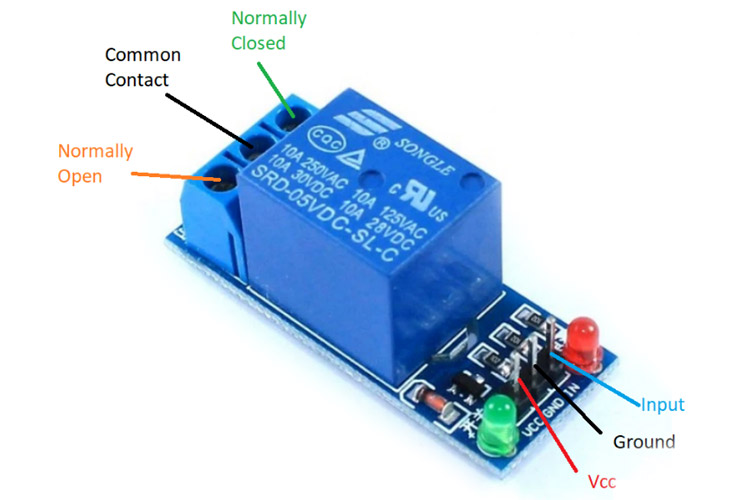
- Relay Module
- DC motor
- 3.3V, 5V or 9V Battery
- Jumper Wires
- Breadboard (Optional)
#Pinout
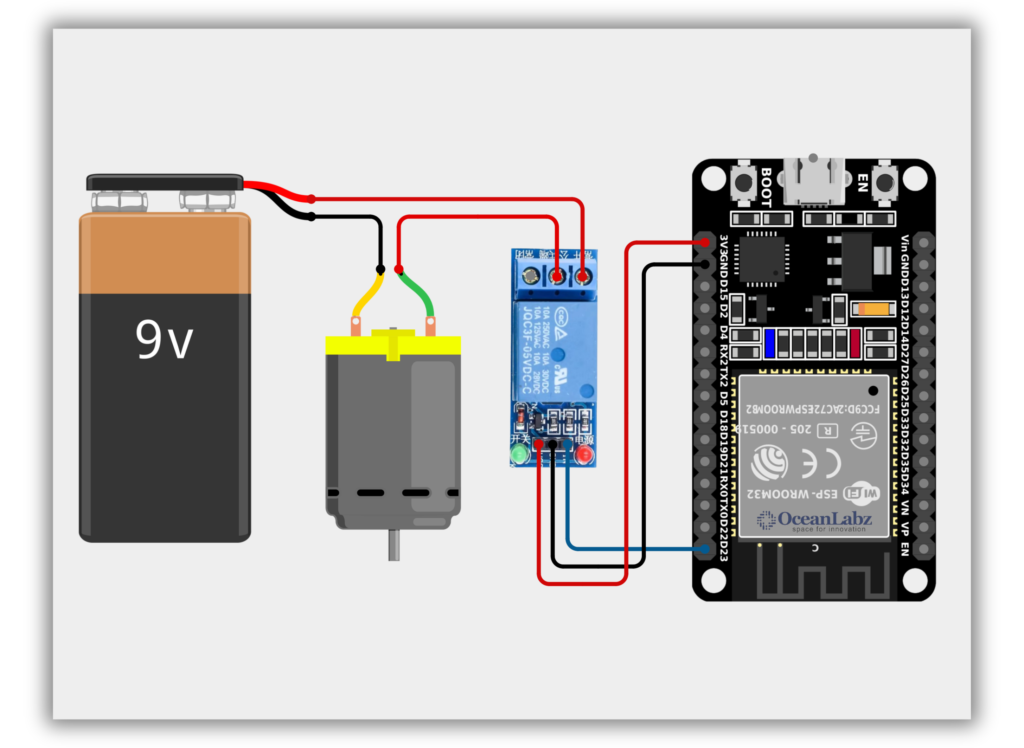
#Circuit Diagram
- Relay VCC → 3.3V (ESP32)
- Relay GND → GND (ESP32)
- Relay INPUT → Pin 23 (ESP32)
#Code / Programming
- Replace
YOUR_SSIDandYOUR_PASSWORDwith your actual Wi-Fi credentials. - The webpage lets you control the motor safely from your phone or laptop.
- The relay toggles the motor’s battery power, keeping everything low-voltage and safe.
/* Filename: ol_Relay_Webserver.ino Description: ESP32 Web Server to control a Relay module. The relay can control a DC motor using battery power. Users can turn ON/OFF the relay from a web browser using Wi-Fi. Author: www.oceanlabz.in Modification: 1/4/2025 */
#include <WiFi.h>
// Replace with your Wi-Fi credentials const char* ssid = "YOUR_SSID"; const char* password = "YOUR_PASSWORD";
// Relay pin #define RELAY_PIN 23
WiFiServer server(80); String header;
void setup() { Serial.begin(115200); pinMode(RELAY_PIN, OUTPUT); digitalWrite(RELAY_PIN, LOW); // Start with motor OFF
WiFi.begin(ssid, password); Serial.print("Connecting to WiFi");
while (WiFi.status() != WL_CONNECTED) { delay(500); Serial.print("."); }
Serial.println("\nWiFi connected."); Serial.print("IP Address: "); Serial.println(WiFi.localIP());
server.begin(); }
void loop() { WiFiClient client = server.available();
if (client) { Serial.println("New Client Connected"); String currentLine = "";
[object Promise]ESP32 Relay Web Control
Control your DC motor or light using this simple interface. Powered safely via battery.
)rawliteral"); [object Promise]} }
#Accessing the Web Server
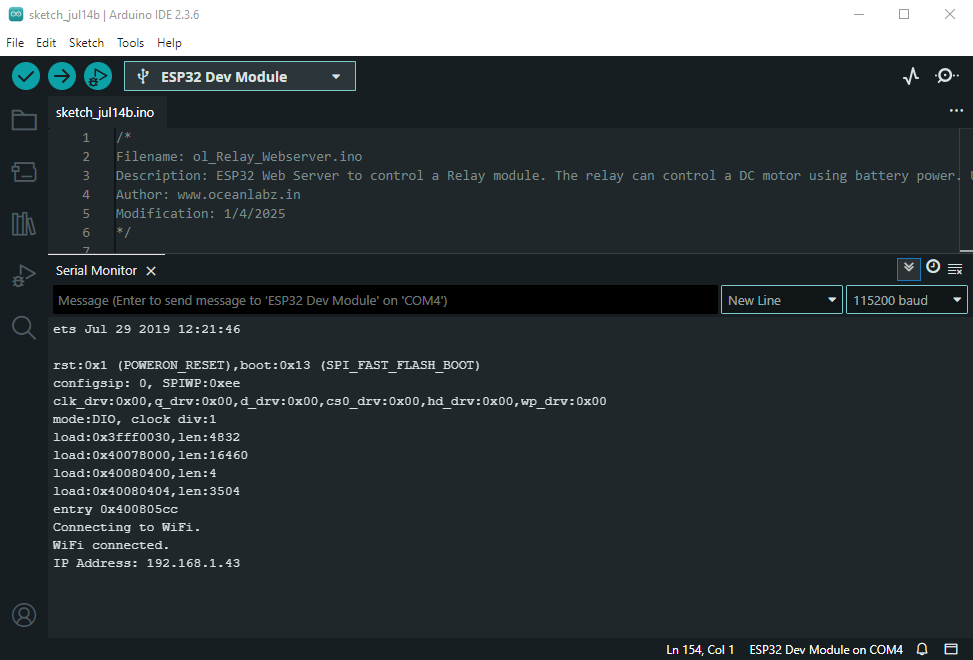
After uploading the sketch, open the Serial Monitor at 115200 baud and press the RESET button on the ESP32. If everything is fine, it will display the dynamic IP address obtained from your router as well as the “WiFi Connected” message.
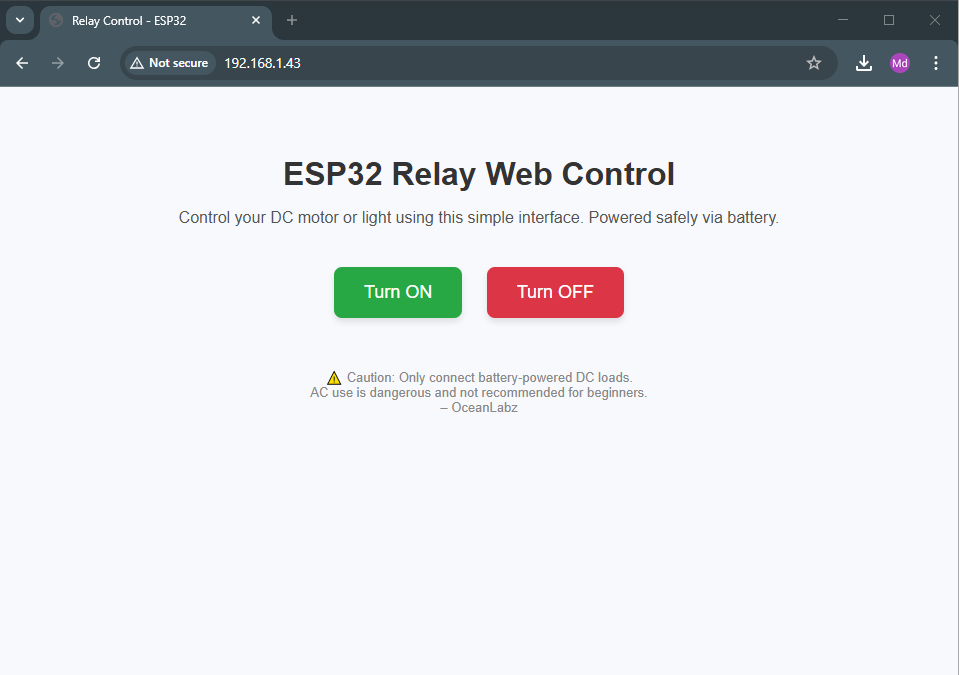
Next, launch a browser and navigate to the IP address displayed on the Serial Monitor. You’ll see a clean web interface with two buttons: "Turn ON" and "Turn OFF". Clicking these buttons will control the relay, allowing you to safely power a DC motor or LED light using the ESP32 via Wi-Fi.
#Explanation
- The ESP32 hosts a web server that provides an HTML interface to control a relay module via Wi-Fi.
- Users can access the control panel by entering the ESP32's IP address in a browser.
- Clicking "Motor ON/OFF" buttons sends HTTP GET requests to toggle the relay state.
#Troubleshooting
- Relay Not Responding: Double-check the relay is connected to the correct GPIO (e.g., GPIO23) and the power source is stable.
- No IP Shown: Ensure the Wi-Fi credentials (
ssid,password) are correct and the ESP32 is within range of the router. - Page Not Loading: Confirm you're entering the correct IP from the Serial Monitor and both the ESP32 and browser device are on the same Wi-Fi network.