ESP32 Joystick with Arduino IDE
## Introduction The Joystick module consists of two potentiometers (X and Y axes) and a push-button switch. It outputs analog values for movement along the X and Y axes, and a digital signal for the button press. Commonly used in robotics, gaming, and interactive control systems. We’ll read the anal
#Introduction
The Joystick module consists of two potentiometers (X and Y axes) and a push-button switch.
It outputs analog values for movement along the X and Y axes, and a digital signal for the button press.
Commonly used in robotics, gaming, and interactive control systems.
We’ll read the analog values and detect button presses using the ESP32 and Arduino IDE**.**
#Required Components
- ESP32 Board
- Joystick module
- Jumper wires
- Breadboard (optional)
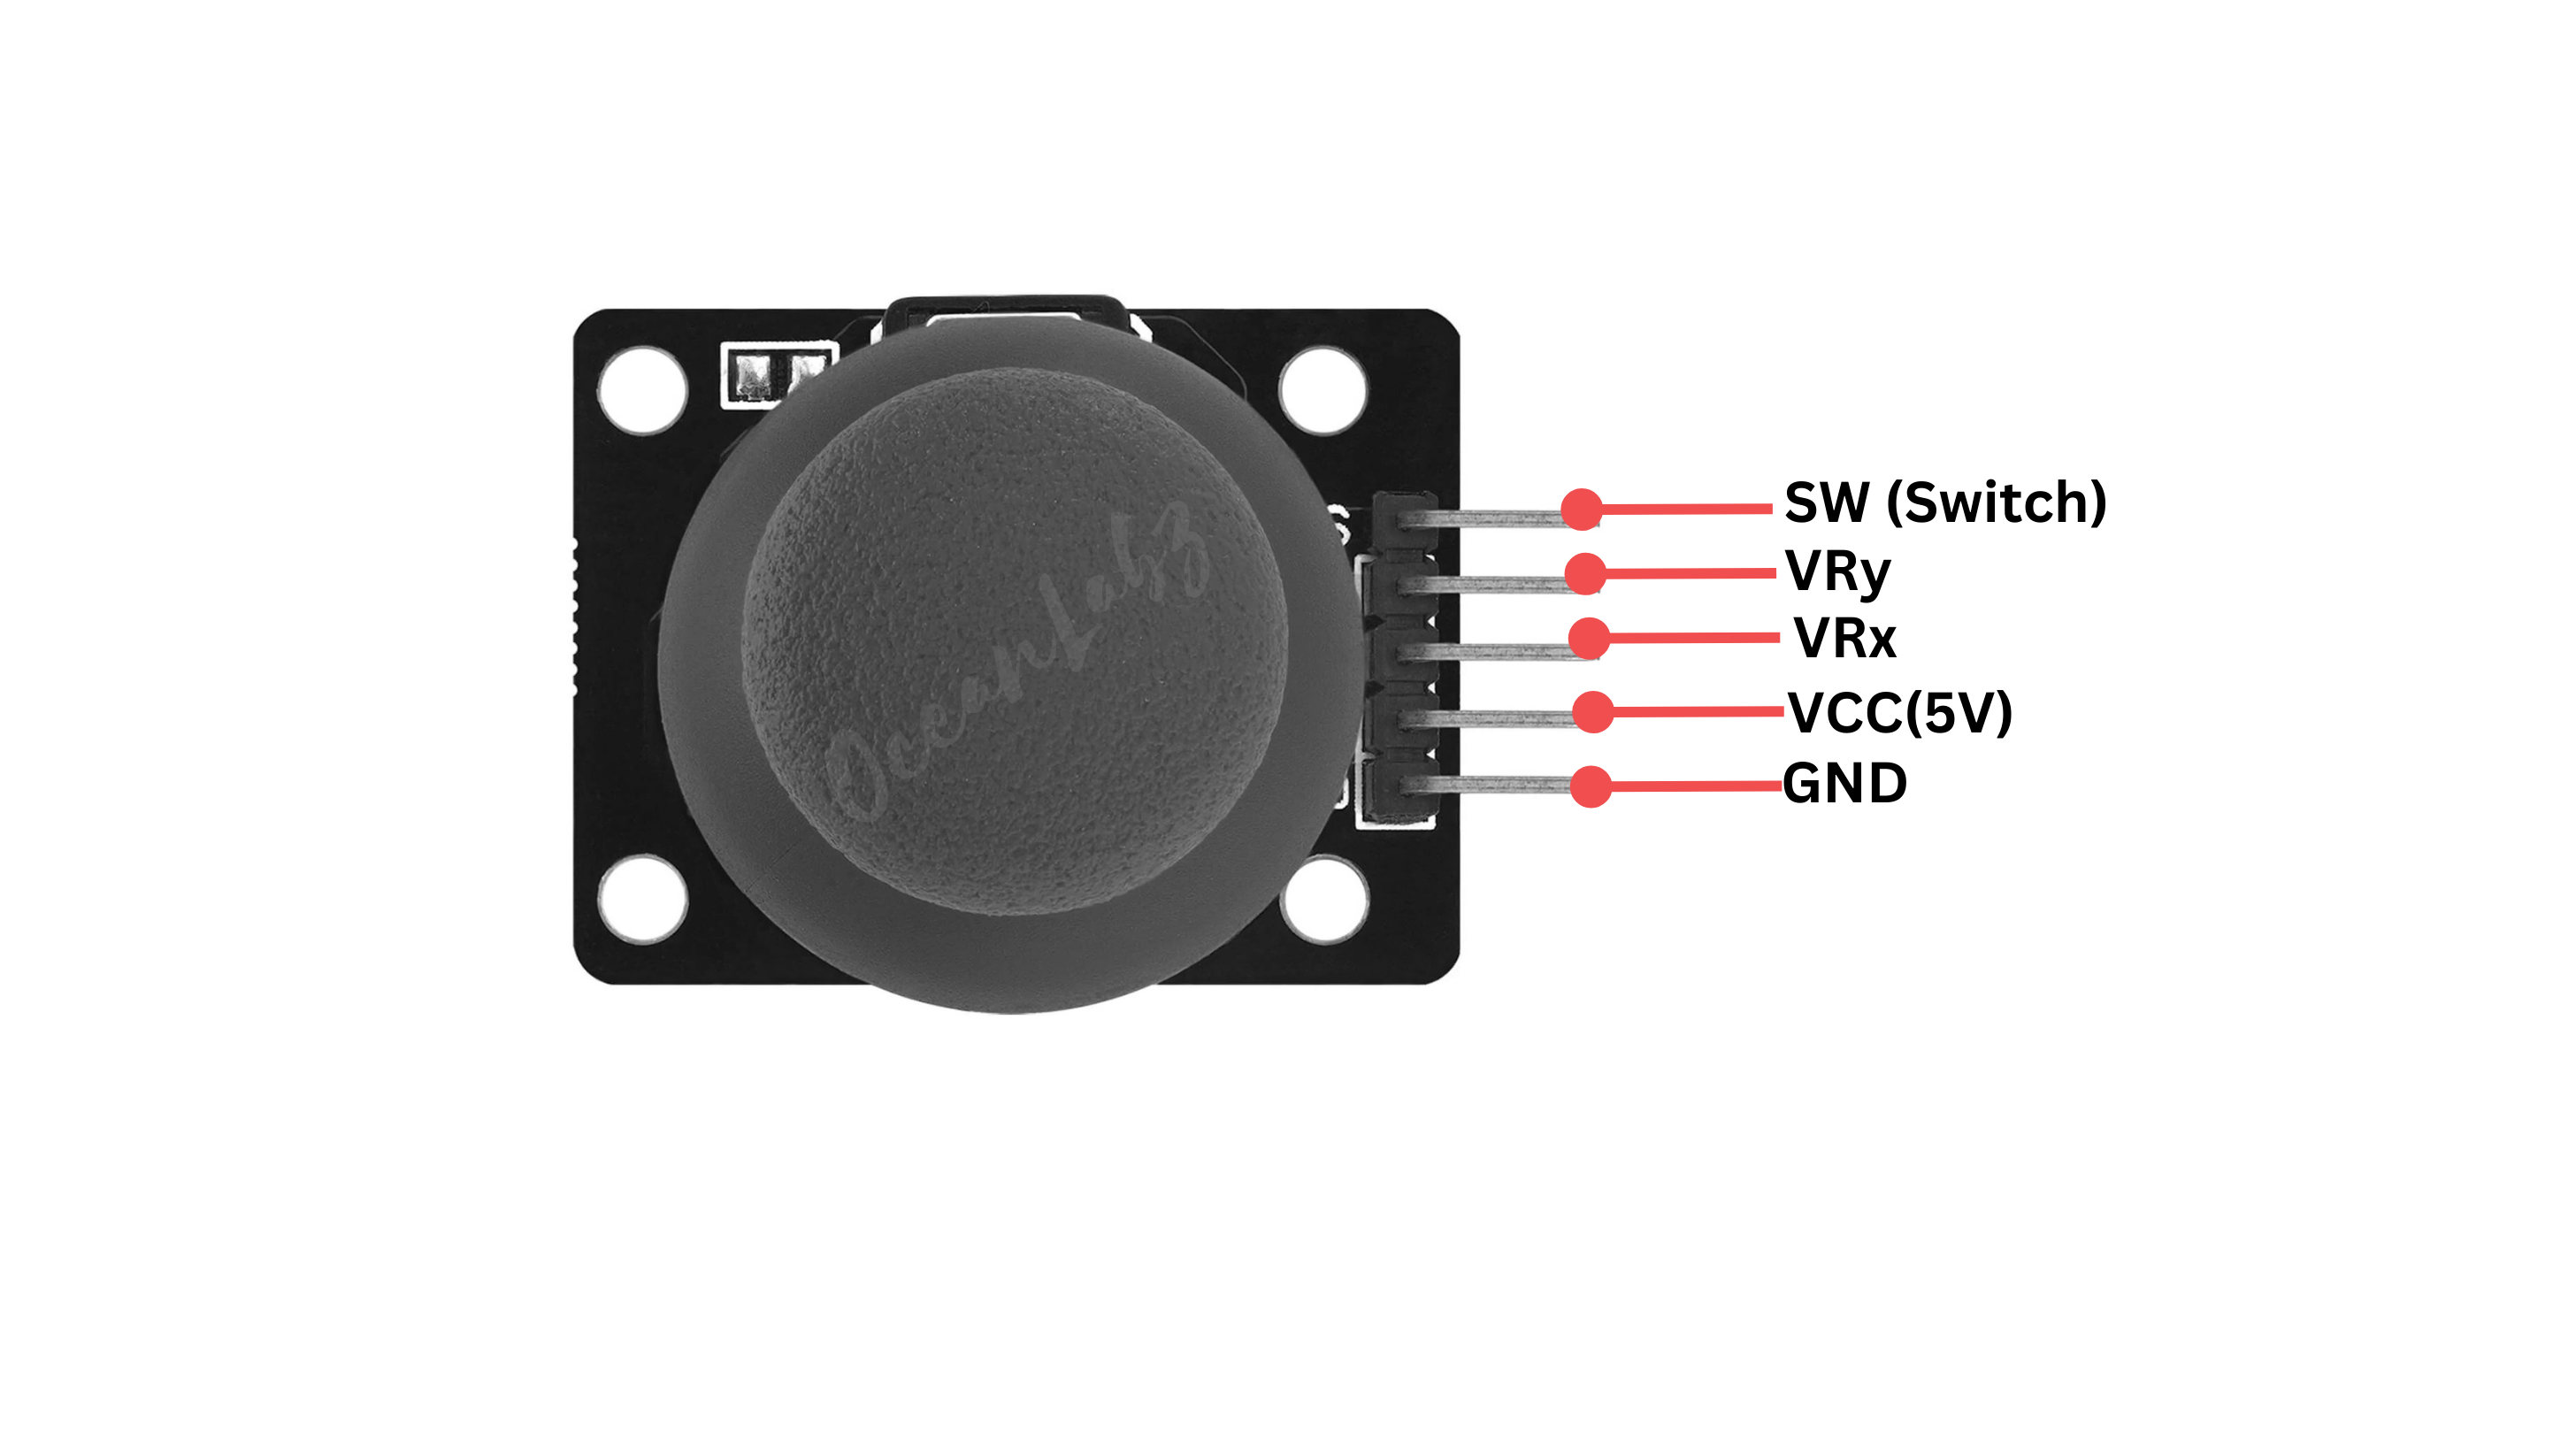
#Pinout
#Circuit Diagram / Wiring
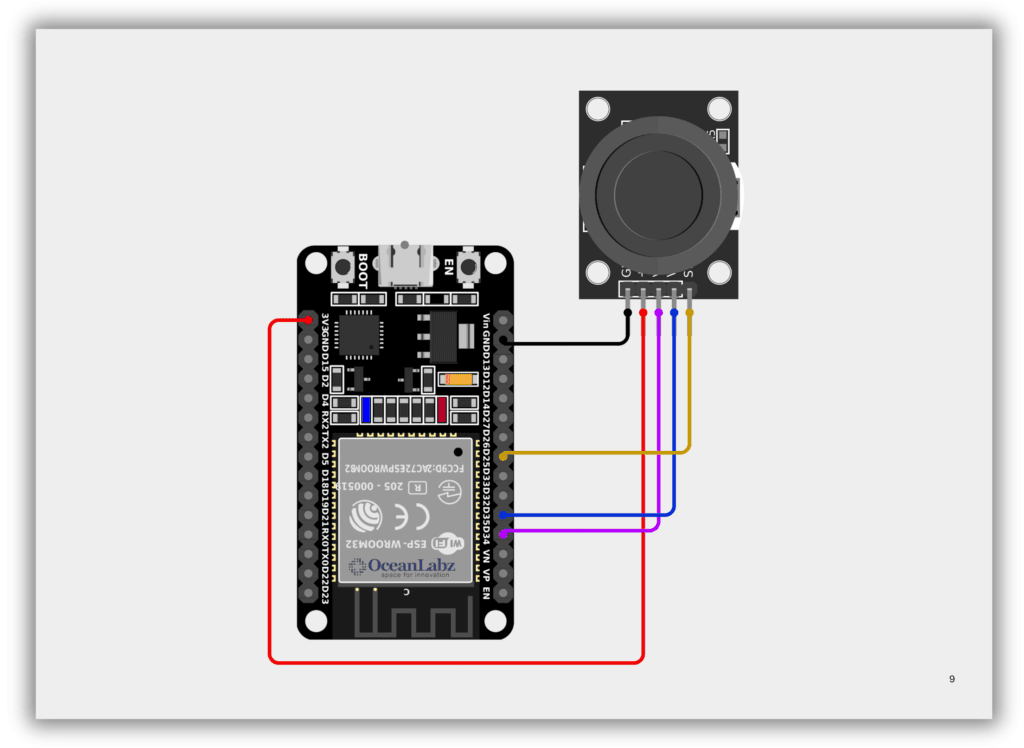
- Joystick (5V) → ESP32 3.3
- Joystick (GND) → ESP32 GND
- Joystick (VRx) → ESP32 GPIO 34
- Joystick (VRy) → ESP32 GPIO 35
- Joystick (SW) → ESP32 GPIO 25
#Code / Programming
/*
Filename: ol_joystick_read.ino
Description: Reads X and Y analog values and button state from a joystick module
Author: www.oceanlabz.in
Modification: 1/4/2025
*/
// Define pin connections const int joyX = 34; // Analog pin for X-axis const int joyY = 35; // Analog pin for Y-axis const int buttonPin = 25; // Digital pin for joystick button
void setup() { Serial.begin(115200); // Initialize serial monitor pinMode(buttonPin, INPUT_PULLUP); // Enable internal pull-up for button }
void loop() { int xValue = analogRead(joyX); // Read X-axis analog value int yValue = analogRead(joyY); // Read Y-axis analog value int buttonState = digitalRead(buttonPin); // Read button state
Serial.print("X: "); Serial.print(xValue); Serial.print(" | Y: "); Serial.print(yValue); Serial.print(" | Button: "); Serial.println(buttonState == LOW ? "Pressed" : "Released");
delay(300); // Short delay for stability }
#Explanation
- The joystick outputs analog signals from the X and Y axes, read using
analogRead()on ESP32 ADC pins. - The built-in button outputs a digital LOW signal when pressed, read using
digitalRead(). - Commonly used for controlling direction, speed, and interactive inputs in robotics or games.
#Troubleshooting
- Ensure the joystick's VCC is connected to 3.3V, not 5V (ESP32 is 3.3V logic).
- Use only ADC-compatible pins like GPIO34, 35, or 25 for analog input.
- If the button always shows "pressed", try using
INPUT_PULLUPand check wiring to SW and GND.
#Project 1: ESP32 Joystick-Controlled Web Shooter Game
#Introduction
This project turns an ESP32 and joystick module into a wireless game controller for a browser-based shooting game.
It hosts a Wi-Fi access point and game webpage, allowing users to connect directly without the internet.
Joystick movements control the player's position, and button presses fire bullets at falling enemies.
All game logic runs in the browser, while the ESP32 streams real-time joystick data via JSON.
#Required Components
- ESP32 Board
- Joystick module
- Jumper wires
- Breadboard (optional)
#Code / Programming
/* Filename: ol_Web_Shooter_game.ino Description: ESP32 creates a SoftAP and serves a web-based joystick shooter game. Joystick reads analog X/Y and button input to control the game. Author: www.oceanlabz.in Modification: 1/4/2025 */
#include <WiFi.h> #include <WebServer.h>
const char* ssid = "ESP32 JOUSTICK"; const char* password = "12345678";
#define VRX_PIN 34 #define VRY_PIN 35 #define SW_PIN 25
WebServer server(80);
void handleRoot() { String html = R"rawliteral(