ESP32: Create a Wi-Fi Manager (Using AsyncWebServer Library)
## Why Create a Wi-Fi Manager with AsyncWebServer? Normally, libraries like **WiFiManager** (by tzapu) handle the Wi-Fi portal for you, but if you want **full control** over the web interface (your own HTML/CSS/JS), you can create a **custom Wi-Fi Manager** using the **ESPAsyncWebServer** library. T
#Why Create a Wi-Fi Manager with AsyncWebServer?
Normally, libraries like WiFiManager (by tzapu) handle the Wi-Fi portal for you, but if you want full control over the web interface (your own HTML/CSS/JS), you can create a custom Wi-Fi Manager using the ESPAsyncWebServer library.
This gives you:
- Custom web pages (your design)
- Add extra fields (like device name, API keys)
- Faster and non-blocking webserver
- Better control over timeouts, redirects, storage
#How It Works
- ESP32 creates a Wi-Fi AP called ESP32-Setup.
- You connect your mobile or laptop to it.
- Visit 192.168.4.1 manually (captive portal is not automatic here by default).
- Fill SSID and password.
- ESP32 connects to your entered Wi-Fi network.
#What You Need
- ESP32 board
- Arduino IDE installed and ESP32 board package
#Arduino Code
Install Libraries
- Go to the “Libraries” tab on the left side (or click
Tools > Manage Libraries). - Click the “Library Manager” button (book icon).
- In the Library Manager window, type the name of the library in the search bar.
- Find the correct library (
**ESPAsyncWebServer**,****AsyncTCP****.).
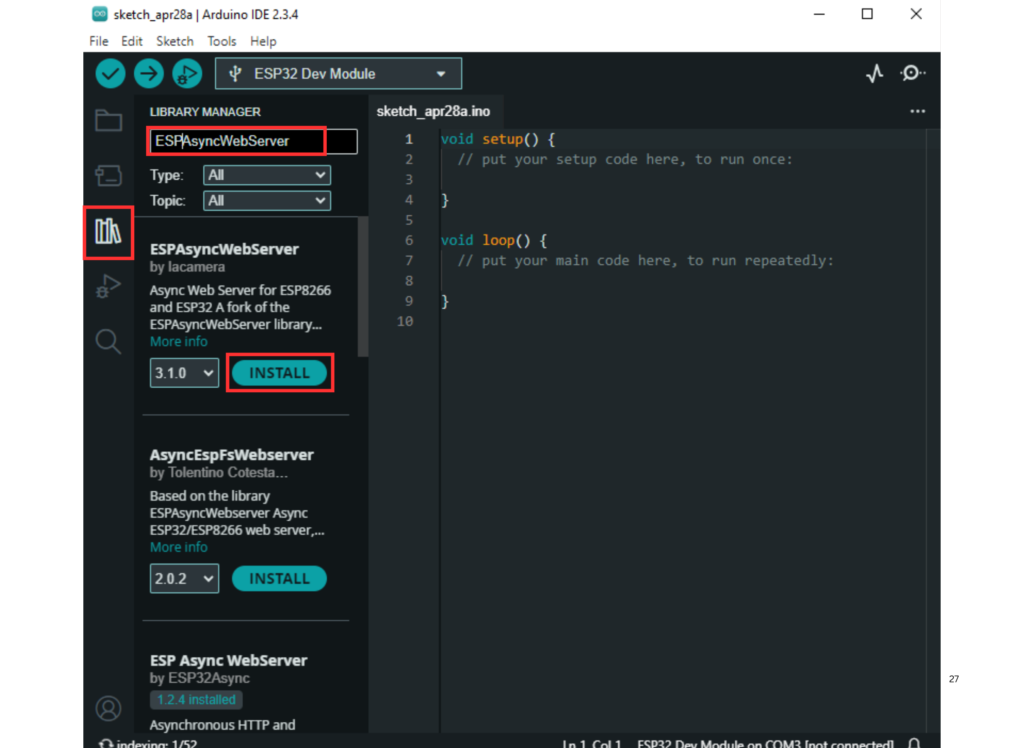
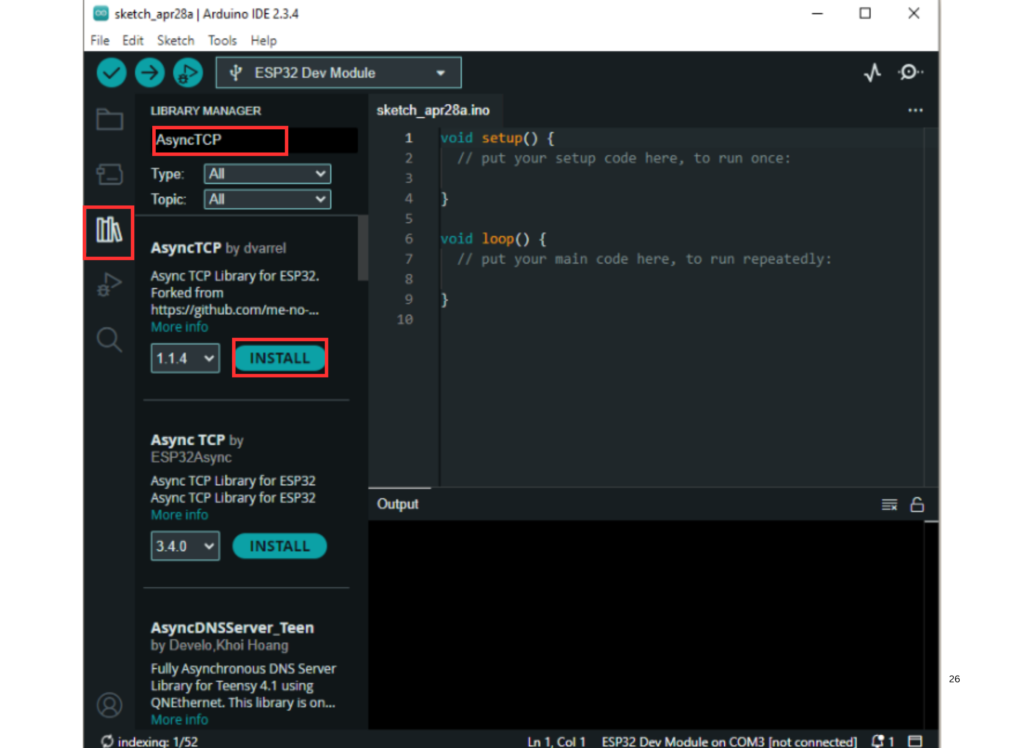
- Click on the “Install” button next to it.
- Wait for the installation to complete — and you’re ready to use the library in your code!
#include <WiFi.h> #include <AsyncTCP.h> #include <ESPAsyncWebServer.h>
const char* ssid_ap = "ESP32-Setup"; // AP name const char* password_ap = "12345678"; // AP password
AsyncWebServer server(80);
// HTML form for Wi-Fi credentials const char* htmlForm = R"rawliteral(
Configure Wi-Fi
)rawliteral";void setup() { Serial.begin(115200);
// Start Access Point WiFi.softAP(ssid_ap, password_ap);
Serial.println("Access Point started"); Serial.print("IP address: "); Serial.println(WiFi.softAPIP());
// Route for root / web page server.on("/", HTTP_GET, [](AsyncWebServerRequest *request){ request->send(200, "text/html", htmlForm); });
// Route to get Wi-Fi credentials server.on("/get", HTTP_GET, [](AsyncWebServerRequest *request){ String ssid, pass; if (request->hasParam("ssid") && request->hasParam("pass")) { ssid = request->getParam("ssid")->value(); pass = request->getParam("pass")->value();
[object Promise]});
server.begin(); }
void loop() { if (WiFi.status() == WL_CONNECTED) { Serial.println("Connected to Wi-Fi!"); Serial.print("Local IP: "); Serial.println(WiFi.localIP()); delay(10000); // check every 10 seconds } }
#ESP32 Auto Restart After Upload
- As soon as you upload the code, the ESP32 will automatically restart.
- Open the Serial Monitor:
- Set Baud Rate to 115200.
- You should see output like:
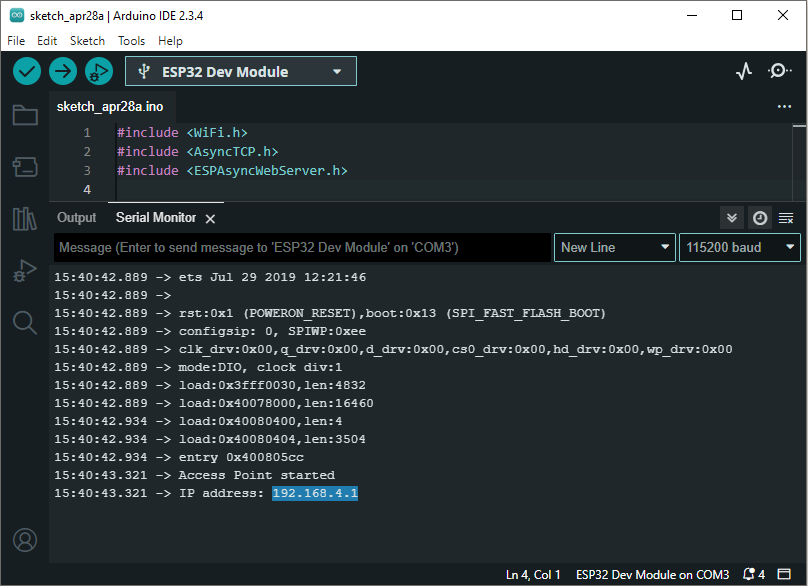
(This means your ESP32 has created a Wi-Fi hotspot.)
#Connect Your Phone or Laptop to ESP32's Wi-Fi
- Open your device's Wi-Fi settings.
- Look for a network called:
ESP32-Setup - Enter the password:
12345678 - Connect to this network.

Important:
You may get a warning like "No Internet Connection" —
Ignore it and stay connected.
#Open a Browser
- Open Chrome, Safari, Firefox — any browser.
- In the address bar, manually type:
192.168.4.1
- Press Enter.
#Fill in Wi-Fi Credentials Form
You will see a simple form:
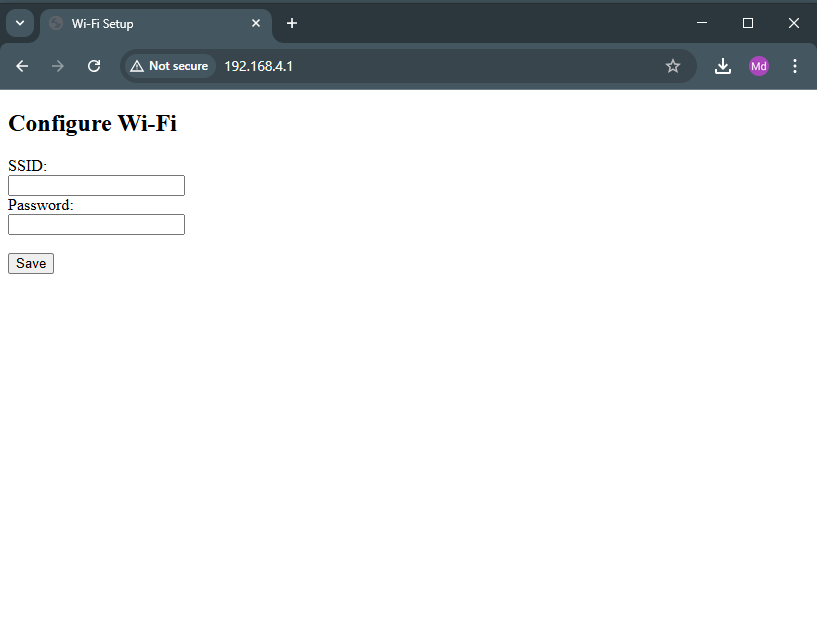
Configure Wi-Fi
SSID: _______
Password: _______
- Enter your real Wi-Fi network name (SSID) and password.
- Click the Save button.
#ESP32 Receives and Processes Credentials
- After saving, the browser will display:
Wi-Fi Credentials Received! Rebooting...
- On the Serial Monitor, you will see:
Received Credentials: SSID: YourNetworkName Password: YourPassword
ESP32 will wait for 3 seconds, then:
- Disconnect its hotspot (Access Point).
- Try to connect to the Wi-Fi network you entered.
#ESP32 Connects to Wi-Fi
If the SSID and password are correct:
- Serial Monitor will show:
Connected to Wi-Fi! Local IP: 192.168.X.X
- You have successfully connected the ESP32 to your real Wi-Fi!
#(Optional) Access ESP32 on New IP
- You can now access ESP32 by typing the new IP address you got (shown on Serial Monitor) into the browser.
(Currently, there is no new web page after connecting — but you can build one later.)
#Advanced Improvements
- Auto Scan Nearby Wi-Fi Networks
- Save credentials in EEPROM or SPIFFS
- Auto Restart after connection
- Timeout if no user connects
- Redirect to main page after setup
#Important Notes
- You have to manually visit 192.168.4.1 (no auto popup unless extra DNS redirect code added).
- Make sure your mobile stays connected to ESP32 AP during configuration.
- ESP32 works best with 2.4 GHz networks (5 GHz not supported).
#Use Case Ideas
- IoT Home Devices (like smart switches)
- Portable ESP32 gadgets
- User-configurable Wi-Fi based products
- Rental devices or demo boards
#Conclusion
Using ESPAsyncWebServer to create a custom Wi-Fi Manager gives you ultimate control over your ESP32’s configuration.
You can style your pages, add extra settings, and make your projects much more user-friendly and professional!